Static html blog
After 2 years of inactivity, I decided to resurrect my blog as a place to store technical snippets. Previously I wrote my blog using Jekyll, but did not get on with Ruby and constant Gem updates, so am giving Wintersmith a try, it’s built on top of node.js, easy to install and under active development.
Last time I ground to a halt because my laptop was stolen before I backed up the code anywhere, so I’ll be pushing the source to GitHub and trying out their user pages for hosting.
Install node.js I chose to download the package and install it, but it’s available on brew as well.
Install wintersmith using npm. The -g option makes it globally available.
sudo npm install wintersmith -gAs I had decided that I be wanted to store the source of the website and host the output on GitHub, I needed to create a repository to show my user pages and a repository to store the source code of the website.
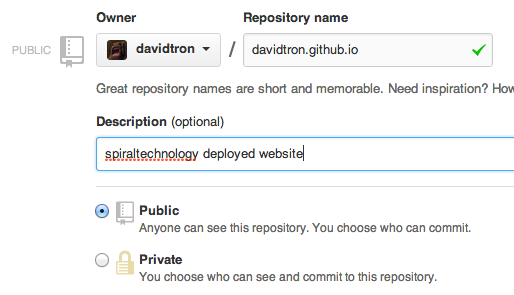
The user pages are created in the format username.github.io so in my case I created a public repository named davidtron.github.io
I then created another repository for the sourcecode called spiraltechnology-website
Open a terminal and check out the empty repository, in my case into my dev directory.
cd ~/dev
git clone https://github.com/davidtron/spiraltechnology-website
Create a new website, by default wintersmith will create you a basic blog structure with a plugin to render blog articles and an rss feed. It complains if the directory exists, but in this case I want to populate the directory of my empty spiraltechnology-website repo, so I used the —force flag.
wintersmith new spiraltechnology-website --force
cd spiraltechnology-website
wintersmith preview
The first problem I had was
template archive.jade: /Users/david/dev/spiraltechnology-website/
templates/layout.jade: > 1| !!! 5
Looks like the version in npm is not yet up to date with the version on github. To fix follow it’s advice and replace !!! 5 with doctype html
nano -w /Users/david/dev/spiraltechnology-website/templates/layout.jadeOnce done you can view the site in a browser on localhost:8080
After creating some content and tweaking the layout and css, I added my files, commited them to my local repo then pushed the changes up to github.
cd ~/dev/spiraltechnology-website-deploy
git add *
git commit -a -m "First pages commit. WIP"
git push origin master
Once happy with the site, you need to configure wintersmith to build the flat files to a local directory and the contents on this directory needs to be published to the username.github.io repository we created earlier.
Checkout the empty repository
cd ~/dev
git clone https://github.com/davidtron/davidtron.github.io.git spiraltechnology-website-deploy
cd spiraltechnology-website-deploy
git checkout master
Configure wintersmith to build to the deploy directory. This is controlled by adding an output option to config.json in the root of the directory wintersmith created for us.
{
  "locals": {
    "url": "http://www.spiraltechnology.co.uk",
    "name": "spiraltechnology",
    "owner": "David",
    "description": "simple, pragmatic, elegant code"
  },
  "output" : "../spiraltechnology-website-deploy"
  ...
}
In the source directory compile the website, it should output it into the newly created deployment directory
cd ~/dev/spiraltechnology-website
wintersmith build
Add the files in the github pages branch and push it up to the server.
cd ~/dev/spiraltechnology-website-deploy
git add *
git commit -a -m "First pages commit."
git push origin master
Check that it’s published after a few minutes at http://davidtron.github.io